Showing posts with label Shell. Show all posts

Wednesday, February 7, 2018

WIlliams Argosy troubles

As is usual, I have yet to get a pinball machine in decent condition. They look ok on the surface but have troubles deep inside.

In the case of the Williams Argosy, I literally could not tell how it looked inside as the key had been lost. In most cases people simply drill out the lock and get on with life, but I have a locksmith I know and he agreed to take a look at it - confident it was a 5 minute job.

After an hour of work, he said he needed different tools and would be back next week.

While waiting, I turned it on - nothing. I opened the back and tried to move things around manually, there is a big wheel in the back - the player motor responsible for connecting things to the different players when playing multiple. I moved it around but could not do much.

We wait for a key...

Saturday, October 14, 2017

installation

Now that the Hot Tip is working again, I have started work on re-assembling the Harlem Globetrotters pinball table back box.

After getting it all painted up, the next step was to get the shell pieces back installed.

Its amazing, how I am able to miss important pieces when photographing the old set up. I took over 40 pictures of the old shell as I took out the boards, mounting brackets and metal sheets, and I never got one picture that showed if two pieces were supposed to connect or not.

oh well, I am doing my best on this and should soon be able to turn it back on and see if it works!!!

Monday, August 28, 2017

Learning spray-painting the hard way

After my first attempt at spray painting, I opted for a much larger gun.  Specifically the 47016 gun.  According to the web page it:

  • Sprays enamels, lacquers, metallic, and urethanes
  • High versatility for automotive and hobby projects
  • Ideal for spraying base coats and primers
Sure sounded ideal. So I picked it up along with my can of Killz Primer.

The Killz website says I can spray at 2,500 psi to 3,000 psi which is far more than my air compressor can deliver.

The spray gun said it was supposed to run at 50 psi, so I set the compressor output at 50 and gave it a try. At first it seemed to work, then soon I got blobs of paint on the tip and the end result of all of this was total crap. The carefully smoothed surface became a mess of blobs and mottled paint:


I obviously need a LOT more experience in painting, but I don't have time to experiment on the cabinet. I want to get it working!

Out came the rattle-can

Wednesday, August 16, 2017

preparing the Harlem Globetrotters Pinball cabinet

After finishing up the Steampunk-Inspired lamp, I have turned my attention back to the Pinball tables. Specifically, getting the Harlem Globetrotters table topper fixed up. 

While the topper wasn't in terrible shape, there were bad edges, dents, the paint was faded and the box was covered in lead-based paint. So it definitely needed some work.

Plus this was a chance to learn a couple of things:
  1. how to do wood repair - specifically how to use Bondo (which is the recommended filler from a lot of repair gurus)
  2. How to spray paint. I have never used a spray gun - I have always used rattle cans (or a roller) for painting.
 I purchased some Bondo-brand filler at the hardware store, mixed it up and tried it out on some bad corners:

After gagging from the smell! I learned two key pieces of information:
  1. Bondo sets up quickly! I was only halfway through my pile of goop when it started hardening and would not spread easily on the wood.
  2. A thin coat is all you need! I laid it on thick, thinking it was like the stuff you put on sheetrock - easily sanded off - hah! I had to sand for hours to get rid of the big ridges and blobs I left all over the wood...sigh


But at last I had it good enough for a first coat of primer.

I pulled out my handy-dandy portable spray booth, set it up in the garage, loaded the top in it:


Got out the 3/4 Oz. Quick-Change Airbrush Kit I purchased:
and started in!

I quickly discovered that the 3/4 Oz. airbrush was far far too small for this use.  It is probable that I cannot get it adjusted to its maxiumum abilities but it is not even close. At its best, all I could produce was a light paint spray about 1 inch wide.

The good news was I was able to learn a bit about using a spray gun, the bad news was I need to purchase one 2 or 3 times this size.
 

Tuesday, June 6, 2017

Brazil backglass artwork continues

Work continues on the Brazil backglass artwork.

I have made it to a pretty hammered section so the progress is slow. Part of the interesting work is attempting to duplicate the artists casual style.

For example, this is a section of a scan of my original glass:


What you are seeing is a bit of the pennant on the top of a sailboat mast and the shoreline in the background. Note how the white of the flag at the top does not match the black outline. The "shore" is even worse, with the black lines mostly working as a guideline.

It means that I don't have to be too perfect as the original was not photo-perfect, but I want it to be as faithful to the original as possible.

Below is a side-by-side section of the sailboat. On the right is the original, not much there... on the left (top) is my best guess of what the sailboat looked like originally:


Note how the lines are not perfect. I hope I did a faithful job on it. Below is a GIF showing both compared:


One sailboat down, 2 more to go.....Work continues!

Tuesday, May 23, 2017

Globetrotters wooden box restoration - phase 2

Primary Sanding is complete. The majority of the (probable) lead-based paint has been removed and I can move one with detailed sanding and application of the first coat of filler and primer!

Wednesday, April 26, 2017

Globetrotters wooden box restoration - phase 1

Now that my computer table is finished (at least phase 1 of it) it is time to turn my attention to getting the Harlem Globetrotters pinball table working again.

As you have read from previous posts here and here, I have started with the back box. The actual wood box is in fairly poor shape, with damaged edges. But at least it is repairable without too much work - some glue and clamping and I should be back in business.

The paintwork is a different story. It is quite bad, faded out and should be redone. 
The old case


Some people like the original paint and want to preserve it at all costs, I prefer a more usability approach. I am taking it down to bare wood and repainting and redoing the graphics. When I am done it should look like new!

Taking it down to bare wood should be easy - sand or heat-gun the old paint off and get on with life. However, since the table is from the late 1970's it is still possible it uses lead-based paint and that means I have to be extra-careful!

So I purchased a lead-paint rated air-filter and a large box to house the case in while I sanded the paint off.

I started with the inside as there are a lot of little angles and corners and I knew it would be more difficult. I was sure right about it! there are so many little edges and tabs and little pieces it is almost impossible to get it all. 

Here is a good image showing what it looks like after a few hours of work. Note all the little edges and crevices!
results from the first day of sanding

After doing about all I can with the power sander, its time to move to sandpaper. Its tricky as to keep lead-based dust down I am running the shop vac inside the sanding box at the same time as sanding... a lot of work!


Monday, April 3, 2017

Backglass Art Restoration

Just a quick post to show I am still working on the United Brazil Bingo Pinball backglass artwork restoration. In addition to my other post on artwork restoration here are a couple of new "before" shots:


You would think this section should be fairly easy to restore. The breaks and tears are in solid-color areas. Of course the reality is that I have to redraw the entire area in Photoshop anyway, but it is relatively easy as the level of detail is low.


This one is going to be tougher. For two reasons. One is that there is a large amount of missing detail. As I mentioned before, this backglass simply does not have any high-resolution scans I can use for reference. And two this is a relatively complex area. It is doable, it will just take some time, especially with my limited skills.

Thursday, March 30, 2017

Wide Ground Wire woes

This is one of those "Who knew?" type of things.

When I was purchasing parts and equipment for the repair of the Harlem Globetrotter Pinball table, I knew I wanted to replace the groundwire. Although it was not in too bad of shape:


The poorly implemented runs bothered my sense of perfectionism (those wires should be parallel!!) and this seemed like a great time to try out a complete redo.

The old groundwire is a small one, so I purchased a big fat one. After all my Dad always said, no matter what it is, if a little one is good, then a big one is "gooder!"


The problem with wide ground wires is they don't curve very much and while it is possible to do the bed-over turn, its tough to make it look good.

Couple that with my poor soldering skills and you end up with less than beautiful results.

When I started this, I hoped to make something that would look good enough to be in a glass case, where people would ooh and ahh over how beautiful all the behind-the-scenes work was. Now I'm just hoping the lights all light up.

Here are a couple of shots showing the difficulties. Its not bad when the wide ground wire only has to make a couple of bends, but when its a zig-zag pattern it really makes it tough to do a good job!


not quite what I was hoping for in the "beautiful work" department...sigh

Friday, May 22, 2015

A few problems with the Harlem Globetrotters

I have done an initial check of the Harlem Globetrotters. It is in pretty poor shape:

The box itself looks to have typical old-wood problem, corners are splintering - but at least it seem solid

The electronics don't work at all. When it is turned on a few lights come on and thats it, no sound, no movement, no nothing.

The playfield is also in pretty poor shape - in addition to the missing graphics in heavy-wear areas there are some more serious issues:

This shows a representative piece of the playfield, much of the paint/graphics are cracked on the wood.


The plastic isn't much better:


The edges are scalloped, cracks around the mounting bolts and even warped sagging pieces - did it sit in the sun or under a heat lamp?


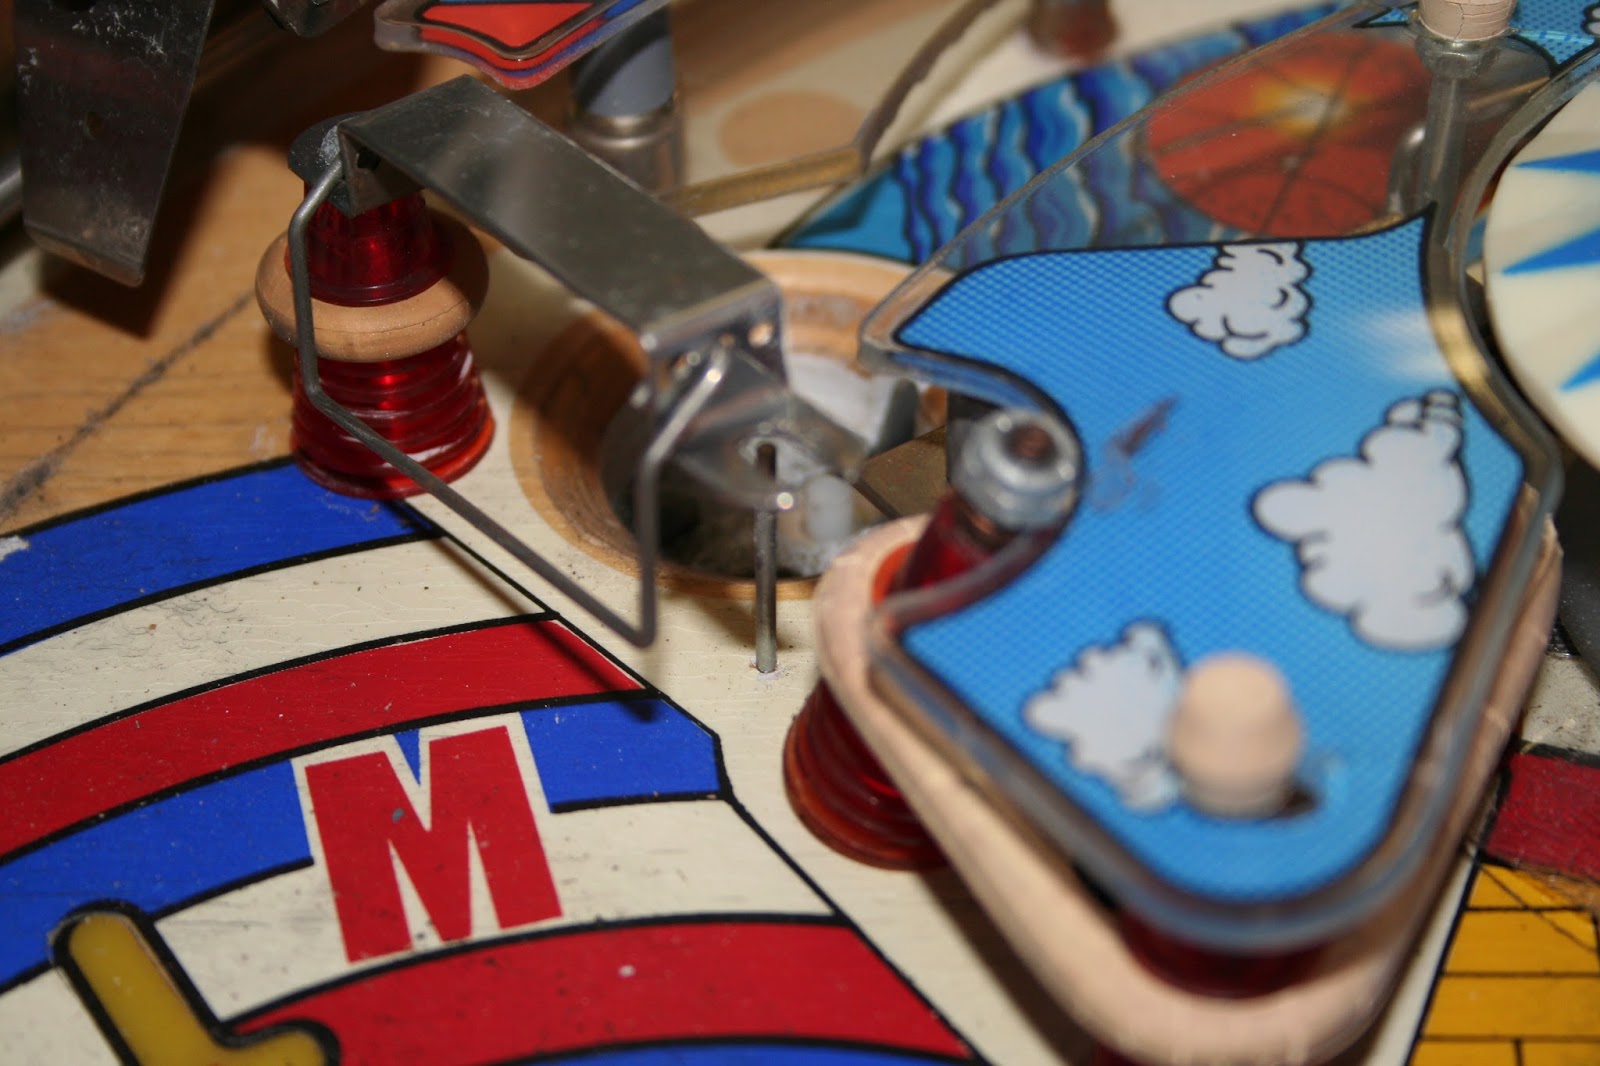
Other problems are around the bumpers, missing and bent ones are in several places:


This one is a bit tough to see but the support pin in the center is bent inward and pushing on the plastic

Also, almost every single slot/hole in the table has a worn out spot where the ball went - this table has seen a LOT of use!


On the positive side, the backglass is in great shape!
it is virtually perfect with only the beginning of paint coming off in the corners around the scoring boxes.

So this one is going to be a lot of work.....

Monday, April 20, 2015

Problems with the Hot Tip Table

I haven't done an in-depth analysis yet but here are the problems with the Hot Tip table:

Shell:

The wooden cabinet is in bad shape. corners that have splintered badly, and the front center looks as though the wood was torn apart by a tow-hitch.

The top glass display is also in poor condition with multiple spots where the paint is missing or bubbling up.

Playfield:

The playfield is in decent shape with only minor wear and all graphics very visible - not bad for a table that is almost 40 years old! However - There are 2 solenoids that are not firing. Don't know if that is a wiring problem or dead solenoids, and if they are dead, how long till the rest suffer the same fate?

Electronics:

The boards have all been replaced! it turns out the previous owners did quite a good job of keeping it going, including purchasing replacement boards a few years past. So things look pretty good on this end.

The digital display is working good, no problems with lights or logic.

Thursday, April 16, 2015

The list of problems

After spending some time with the unit last night, my summary is:

Outer Shell

The shell is in pretty good shape considering it is around 40 years old.
 
 
The glass has a lot of scratches on it, the frame around the glass is worn down so the bare metal is visible. The sides are not wood but appear to be a Formica-like wood-simulation laid down over plywood. On the bottom the base is the same, a Formica-like hard coat over plywood. There are chips in the corners but all in all, not too bad.

Playfield

The playfield looks pretty good for the age.
 
When you look close though, it is apparent that the paint is barely hanging on. Look at the "7000" yellow ellipse. You can see the clean area where a mylar plastic film was laid down years ago, and what the unprotected surface looks like.
 
 
I don't see myself removing all the paint and completely redoing the table surface, but a good cleaning and touchup will definitely be needed.

Power/Electronics

There are some problems here.

The person I purchased it from said it played well but got really smoking hot underneath and blew fuses.
In my tests, I am getting inconsistent results. The Power-On-Self-Test runs correctly so the power supply is generating the proper voltage and the main logic board is happy.

However, in 10 power-on tests. My results were:
Logic board: powered on all 10 times, worked good.
Sound board: powered on all 10 times, worked good.
Playfield lights: powered on all 10 times, worked good.
Score display: powered on 2 times. Passed test when it did come on.
Playfield solenoids: never powered on at all.

Based on the report from the previous owner that it played well and that the solenoids don't work at all and the score only displays sometimes, I am currently suspecting a power problem.

Time to get out the multi-meter!